First, most tech savvy people have likely heard of the various tricks you can use to try to get data off of a failing hard drive. Put it in the freezer, knock it on the side, drop it, sacrifice a virgin keyboard under the pale LED light…. Some of those tricks might actually work on occasion, but I’m here to tell you than none of them – no, not even the keyboard sacrifice! – have worked for me in my lifetime of geekdom. But there’s one option that I have heard can work: the hard drive transplant.
I actually have a brother who successfully recovered the data off of a failed laptop drive using a transplant maybe six or seven years back. The idea is pretty simple to grasp: when a hard disk fails, there are various components that can go bad, including the power delivery system, the circuit board, the motor/bearings, and/or the drive heads. In his case, my recollection is that either the drive heads or the motor (or both) was at fault. So, you go out and buy a working drive that’s as close to identical to your failed drive as possible, and then swap some of the working pieces into the failed drive and presto: you have your data back. In my brother’s case, he got the pictures and data he was after, but he noted that the “fixed” drive was super slow – like transfer speeds of around 2-5MB/s when 20-50MB/s should have been possible. After copying the data off to another hard drive, he tossed both the donor drive and the “sort of working” drive in the trash and called himself lucky. So, it can work, but it’s by no means guaranteed.
Round 1: Fight!
Fast forward to my latest attempts at fixing a crashed hard drive, this time from my dear old dad. He has a bunch of photos that were stored on an external HDD, a 250GB Western Digital IDE drive from 7 years ago. I confirmed the drive was dead – it spins up, clicks, sounds like it powers off for a split second, then tries again. Lather, rinse, repeat, but the drive is never recognized by the OS when connected via USB, or by the BIOS when connected directly via IDE. I went on eBay and looked up the drive model, found a potential donor drive, and ordered it. I was rash and a little too confident, unfortunately, and when the donor drive arrived I realized I hadn’t done my due diligence:

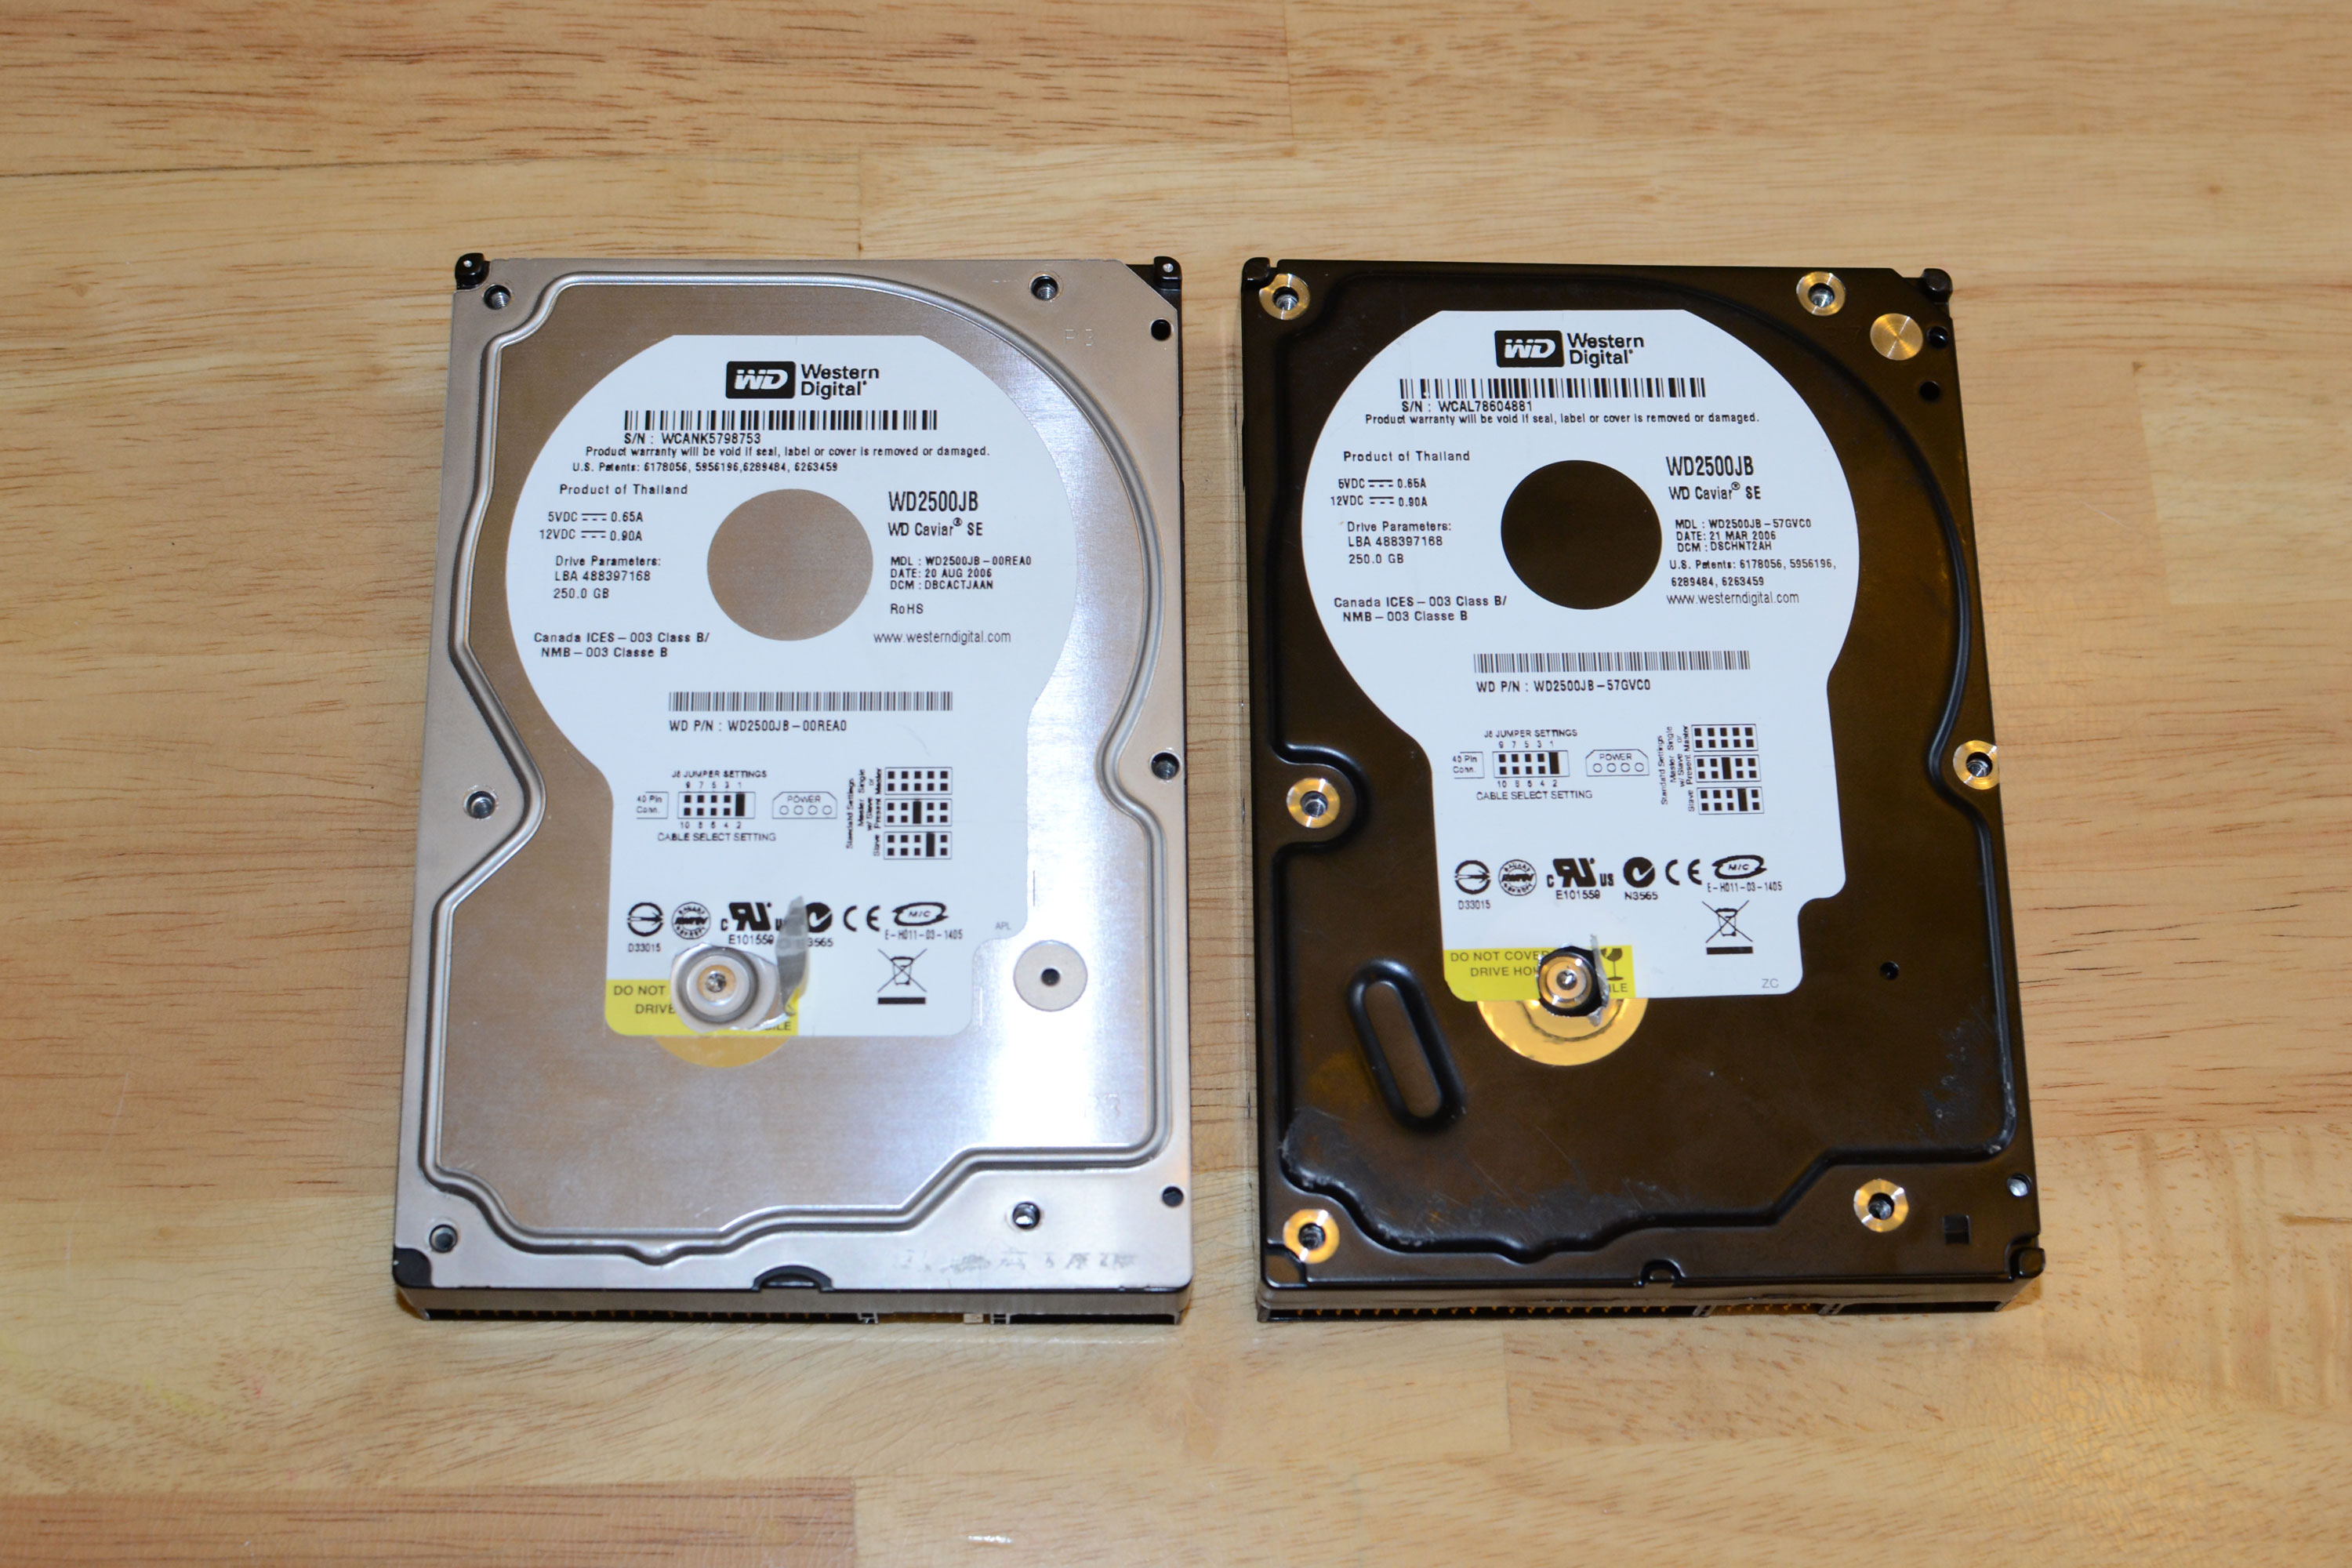
I had a new Western Digital WD2500JB Caviar SE, but this model had different firmware, a different PCB, and a silver case instead of black, and a manufacturing date that was five months later than the dead drive. But, the donor drive worked – I confirmed this in both the USB enclosure as well as with a direct IDE connection – so I decided to try doing a transplant. Here’s where things got really dumb on my part.
First, I should have tried swapping the system boards; if that didn’t work on the new drive, I would at least know that the firmware was incompatible. That wouldn’t put the kibosh on the transplant idea, though, as the drive heads might be compatible. Anyway, I threw caution to the wind, opened the failed drive, opened the donor, pulled everything apart – while snapping pictures of the process – and then got it all back together again. I tried to be careful, but in retrospect I was really foolhardy with my approach. Not surprisingly, the transplant failed – I tried swapping platters from the dead drive to the working drive, swapping drive heads, swapping circuit boards – basically all of the possible combinations, only not in the most logical order of progression. After the failed drive continued to emit the “click of death”, I reassembled the donor drive and found that it too was now dead and clicking. Oops.
Round 2: Use Your Head
For my next attempt, I did more research. I figured I needed to get the exact same firmware revision, and finding someone that was selling the right drive took quite a bit more time. Eventually, I did get a second drive, and after my first experience I was a little afraid to try again. I did more research, got some ideas, and finally tried again – but without so much bravado.
This time, I checked that the donor drive actually worked (it did), and then I started by swapping circuit boards. With the donor drive, I could use either circuit board and it was still fine, so at least on that level the two drives were compatible. Next, it was time to try swapping some other part to see if I could fix the failed drive. Given what I just said about circuit board swapping, that was my first attempt, and not surprisingly the original drive continued to emit a click of death on power up. Most likely it has crashed drive heads, so that was the logical next item to swap.
Having discovered that the removal and replacement of three platters can be tricky at best, I wanted to avoid doing that again, so I just needed to remove the drive head assembly from the donor and put it in the original drive. This is easier said than done. One thing I read is that the drive heads are extremely fragile, and if they touch each other they’ll usually be broken in the process. To prevent this, you need to put a little shim in between each set of heads so that when you move the actuator off the platters, the drive heads don’t snap together. I created three shims, got them into place, pried apart the strong (VERY strong!) magnets that help the actuator position correctly during operation, and carefully removed the head assembly. Except…I screwed up again!
A few other pieces of advice are in order at this point. First, I read that you don’t want to move the drive heads/actuator unless the platters are spinning in the proper direction – basically, reduce friction on the drive heads. I did my best to make sure the platters were rotating, though it’s possible this screwed up the donor head assembly before I got any further. Second, to get the head assembly out, on the WD drives you need to remove two screws that hold the top magnet in place, then pry the magnet apart (I used a flat head screwdriver), and then you also need to remove the little drive park stopper that has a smaller magnet that keeps the heads parked when the drive is powered off. Getting the magnets apart and removing the little plastic piece is a bit tricky, so again I may have damaged the heads at this stage.
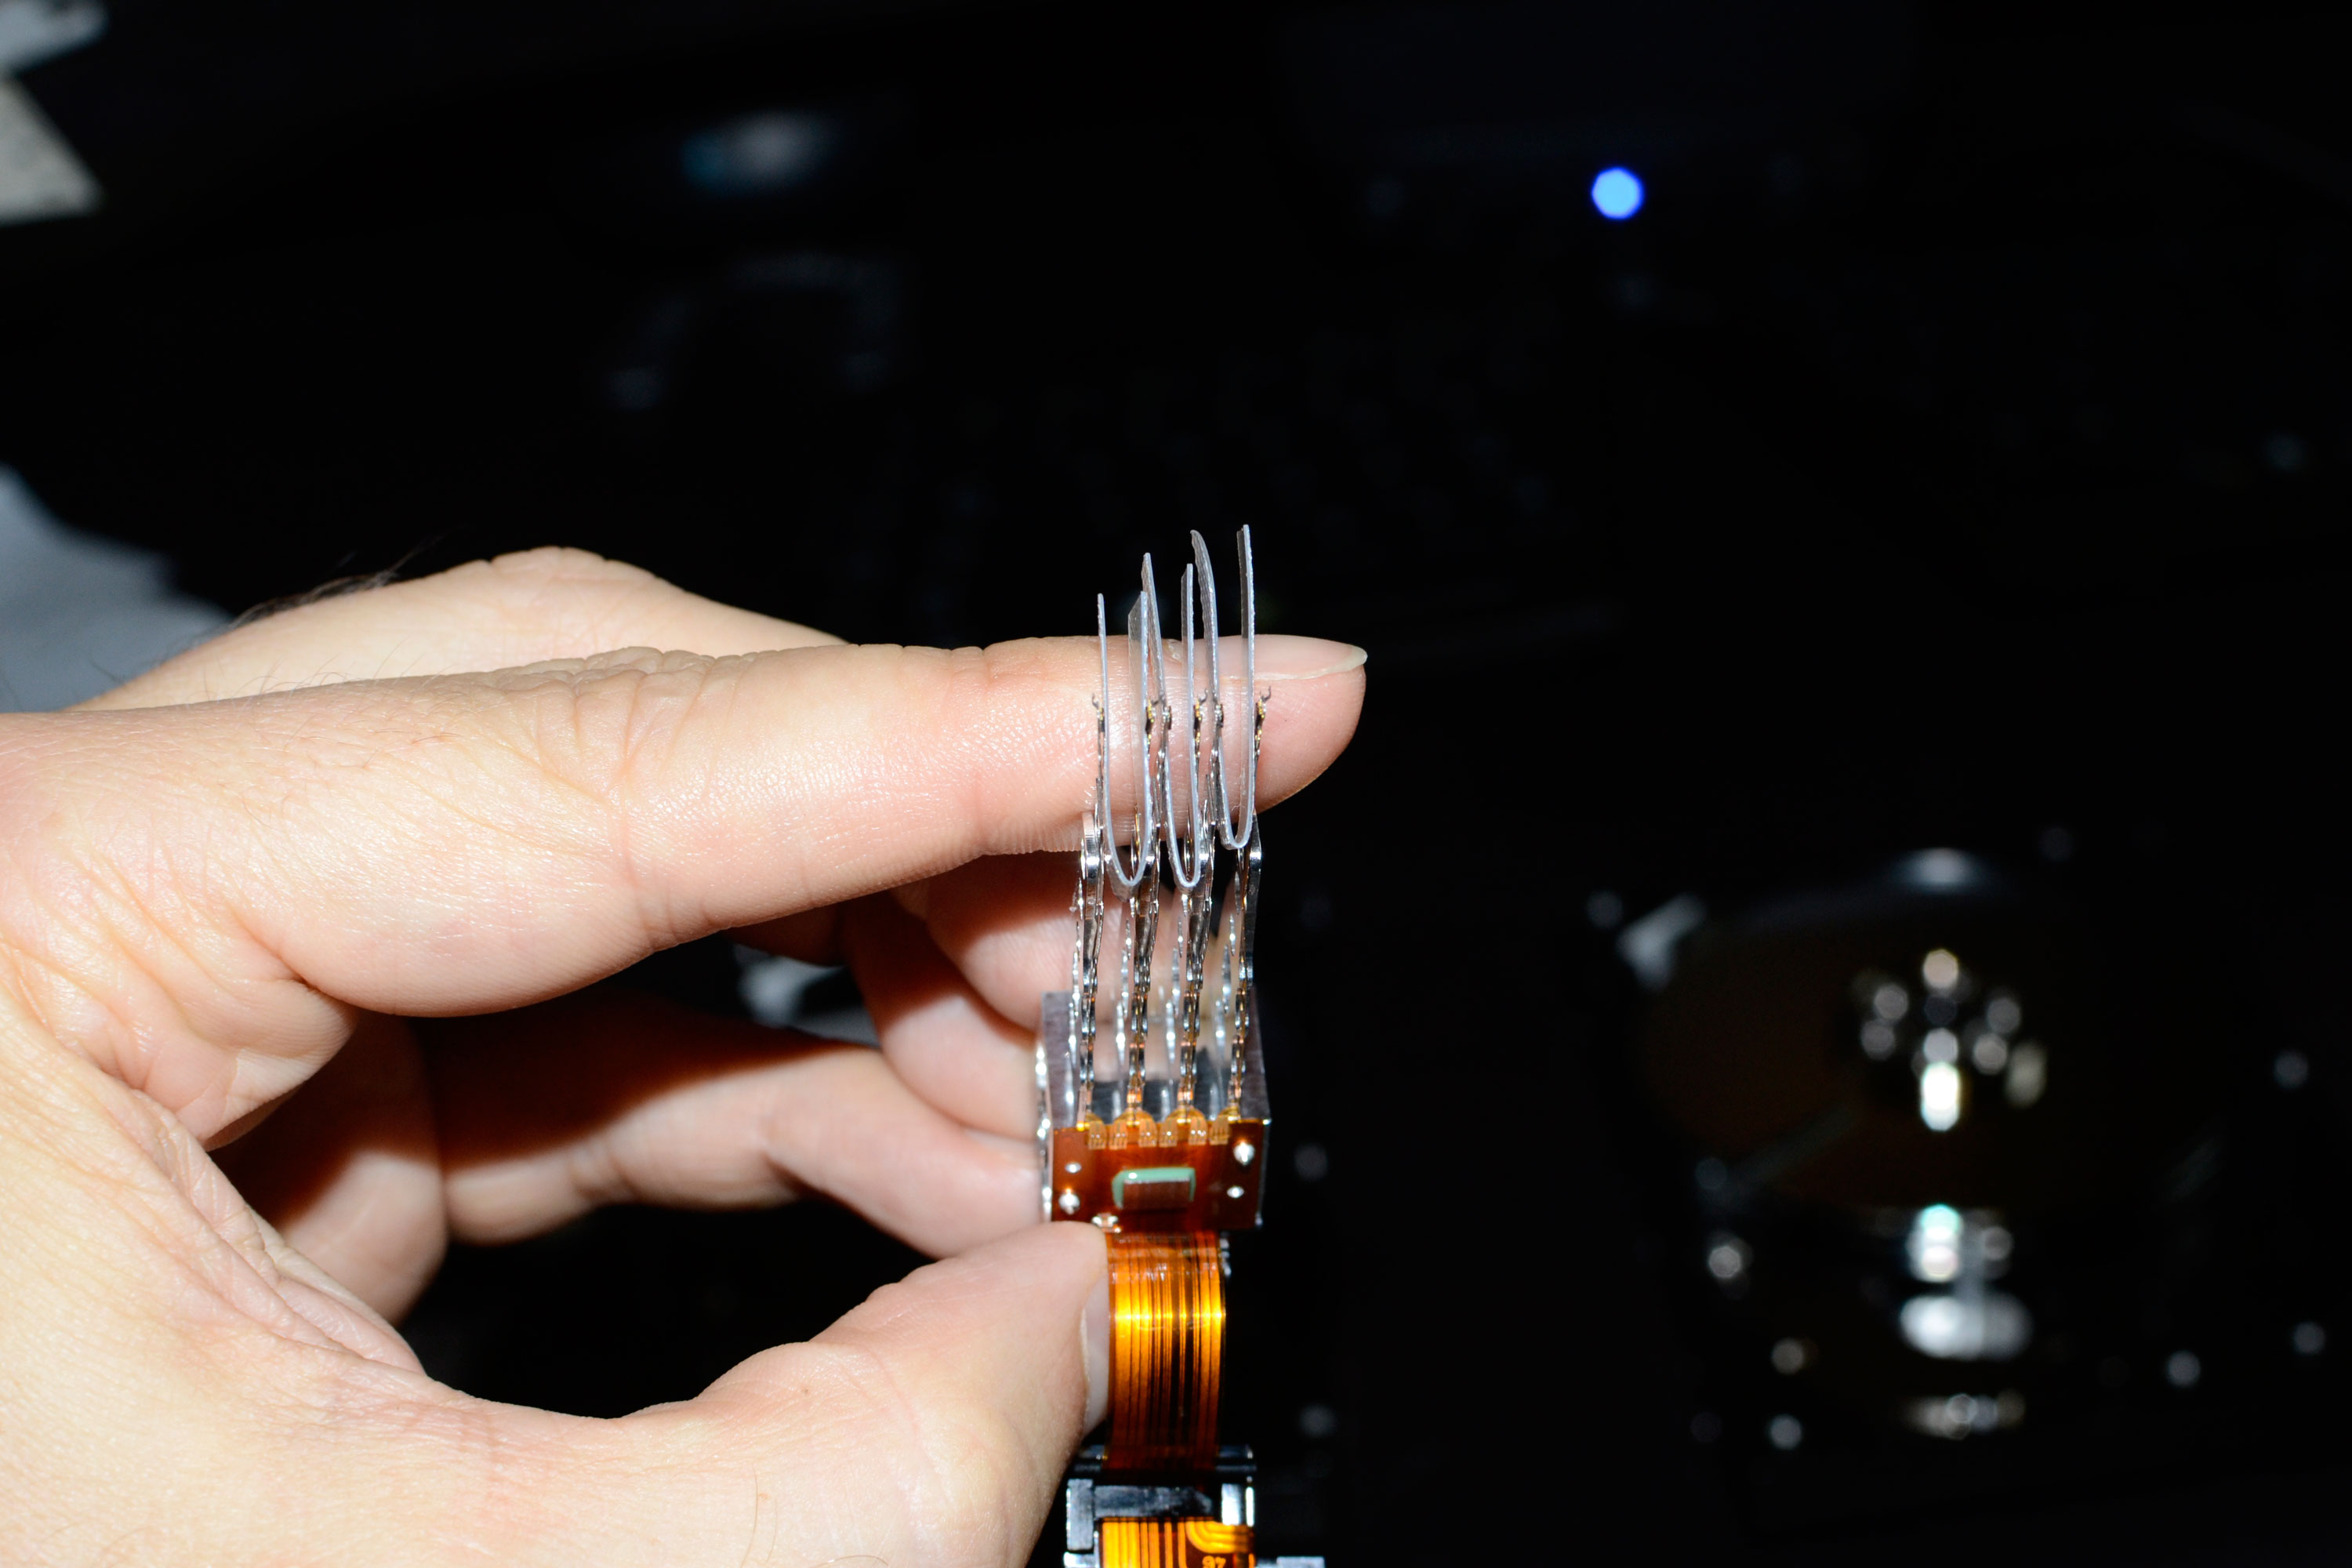
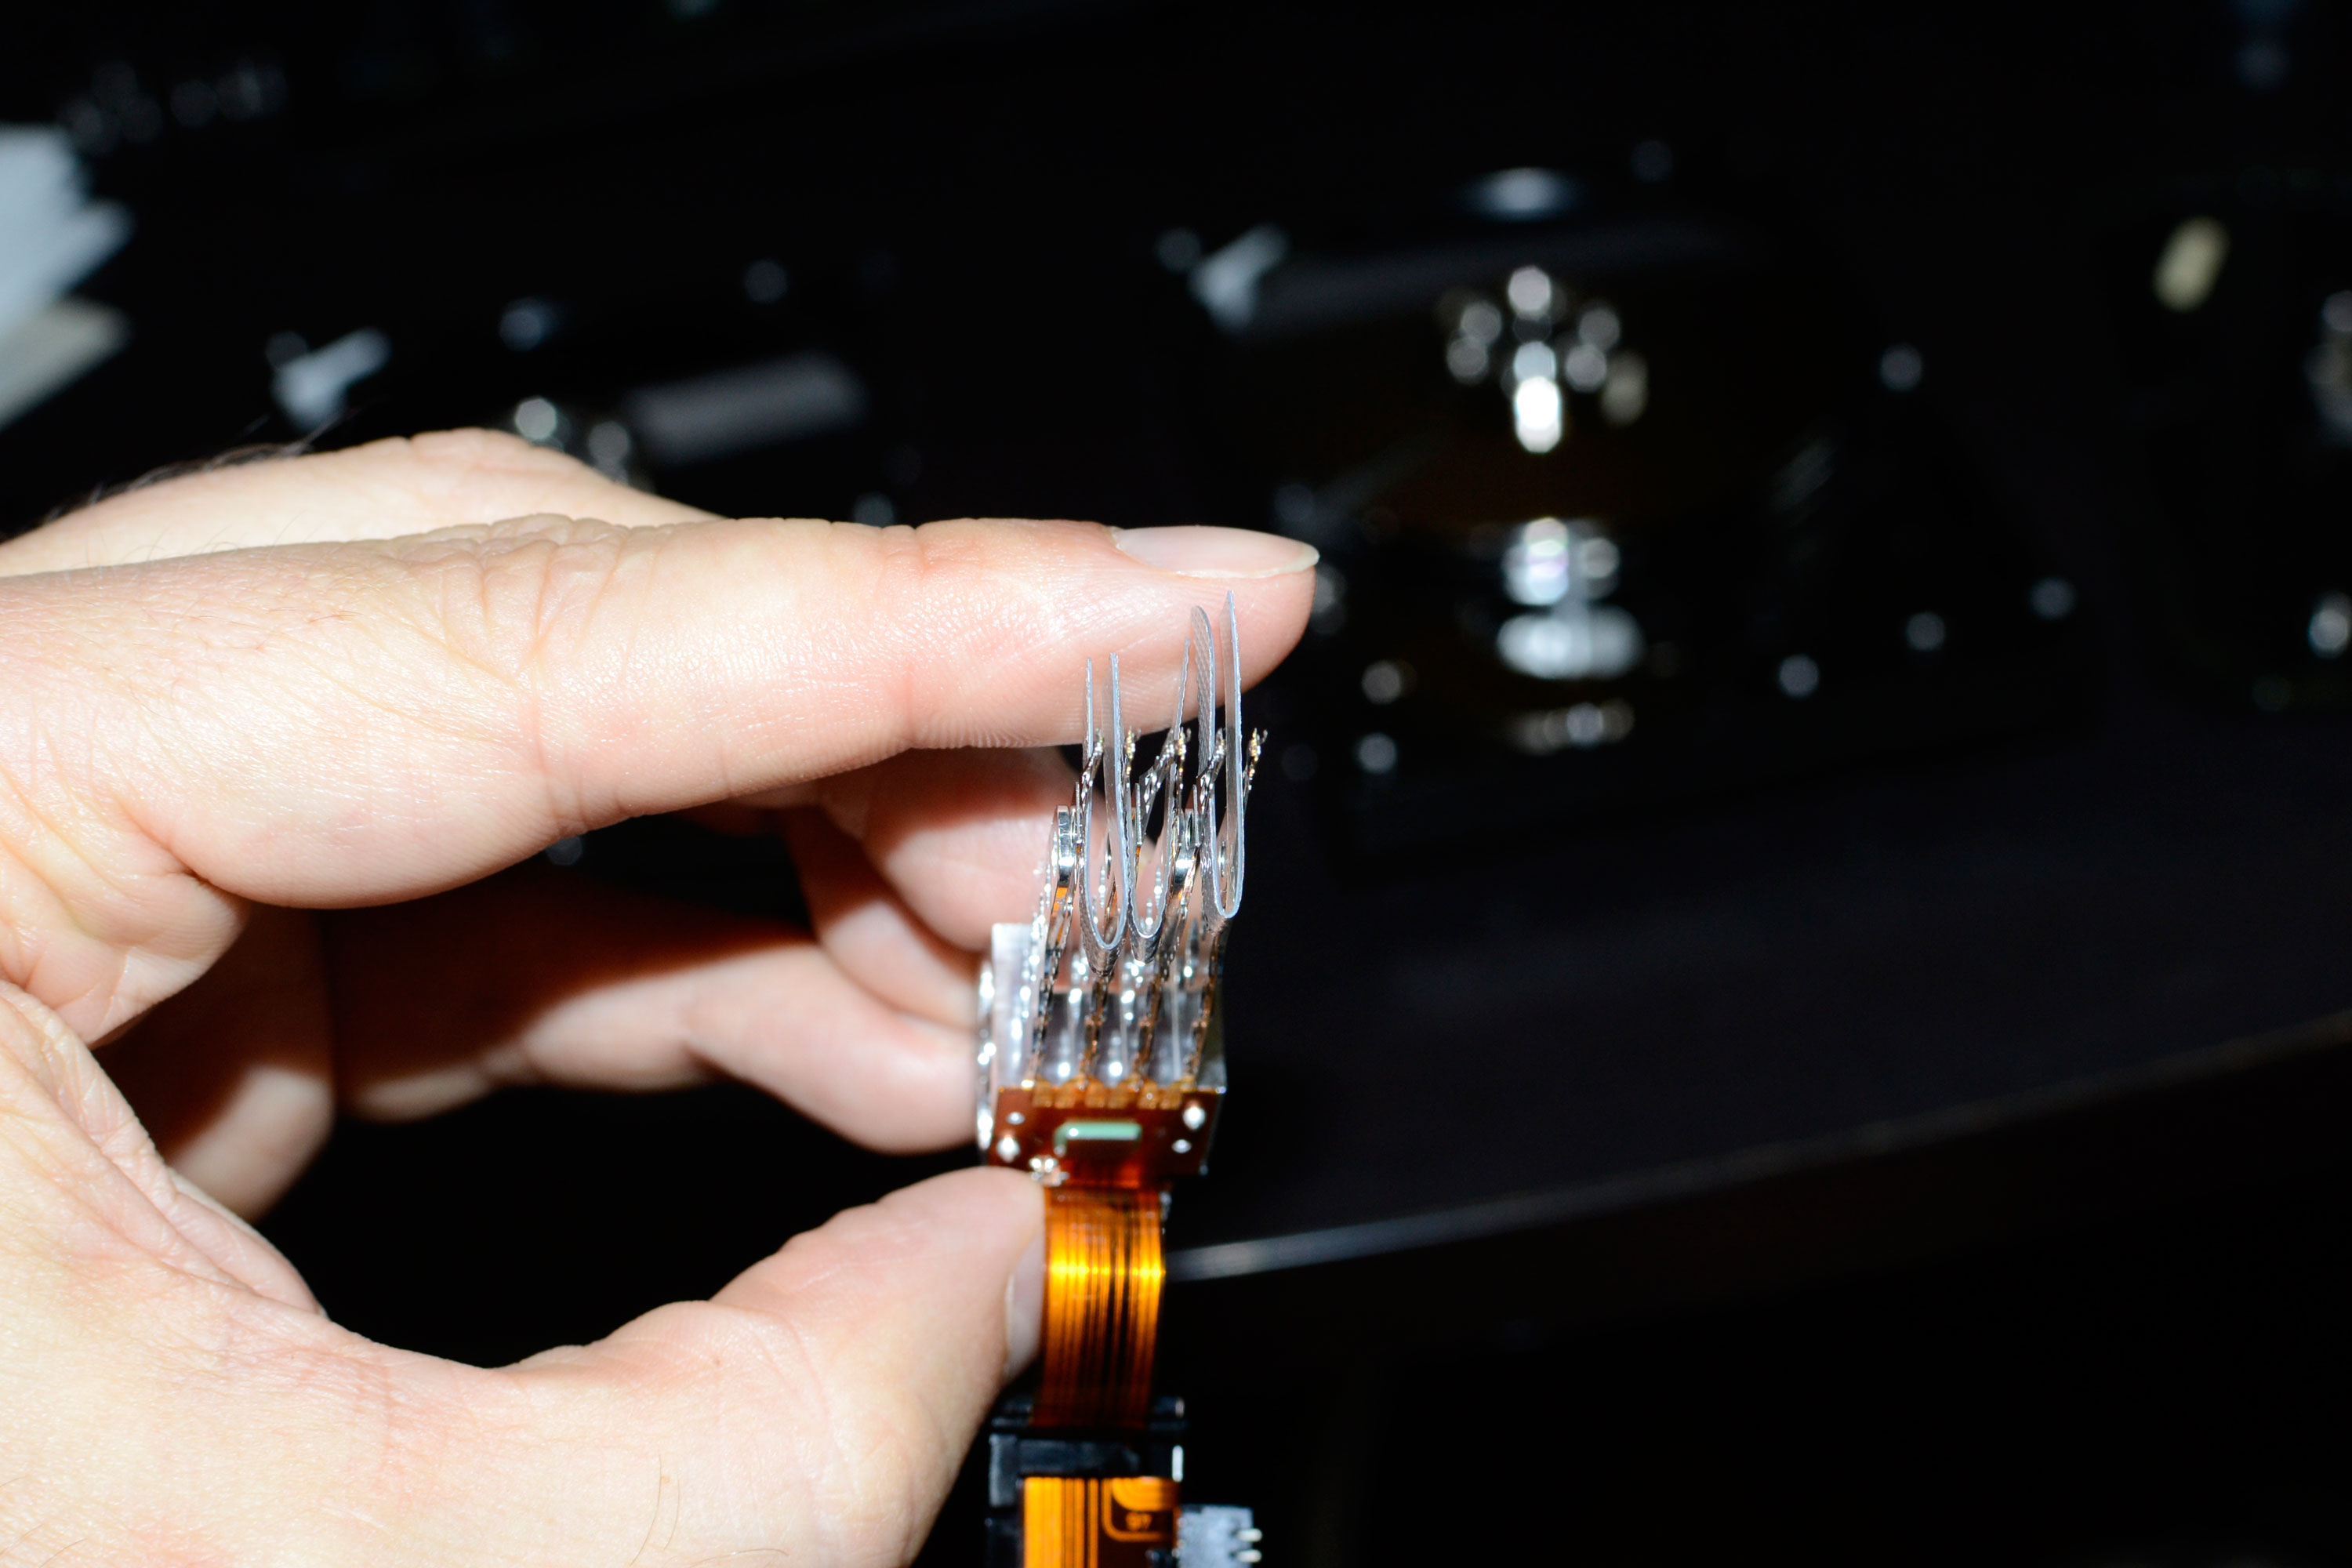
Finally, I talked about the shims, and I want to make special note of the fact that the more platters you have, the more difficult it’s going to be to get all the shims properly installed. You’ll probably make some slight scratches if you’re using homemade shims like me, but I don’t know if that’s enough to fully kill the operation (more on this below). With the top magnet removed and the shims in place, if all goes well you can move the heads off the platters and they won’t touch, and then you can remove the head assembly. It should look like this:
But remember how I said I screwed up? Well, I had the three shims in place I thought, but it turns out I missed on the middle platter so those heads connected. Uh oh. So instead of the above result this is what I had:
I put the shim in the proper position, but at this point I feared for the worst. After putting the heads into the patient drive, my fears were confirmed: more clicking to death. Except, the clicking wasn’t quite as bad, so perhaps only those middle heads are dead? Regardless, the BIOS/OS still won’t recognize the drive so the data is still lost. I also swapped the hardware back into the original donor drive and confirmed that it’s no longer working, so sure enough the drive heads are now dead. That’s my failed HDD transplant attempt #2.
Round 3: One More Try
With the previous failures under my belt, you’d hopefully think that I’d learn my lesson and move on – clearly transplanting hard drive parts isn’t my specialty. However, I have a friend that also contacted me with their own drive, and I figured I would give it one more go. This time the failed drive is a Maxtor DiamondMax Plus 9 80GB IDE drive from late 2004, but despite the age there’s a potential advantage. Where the WD2500JB has three ~83GB platters, the Maxtor has a single 80GB platter, so the transplant should be easier. I once more sourced a drive from eBay with the same firmware, and I confirmed the drive was working (note the “was”). I also swapped PCBs as my first test for compatibility and that worked fine – I formatted the drive and copied over 5GB of data, consisting mostly of larger files, and measured a transfer rate of around 15MB/s. How did we ever live with such performance?
This time, I wanted to debunk one of the oft stated rumors of the hard drive repair “professionals”: don’t open up the drive, because as soon as you do your data is as good as gone! And don’t forget the one about needing an ISO Class 5 clean room. Such claims seem a bit much, designed to get people to pay a thousand dollars to retrieve their data. Keep in mind that I’m not trying to get the drive in a permanently working condition; I just want to get it to read data for the hour or so it might require for me to copy off important files, and then the drive can hit the trash bin for all I care.
So my first step this time after doing a PCB swap (which didn’t fix the broken drive) was to open the Maxtor drive, carefully move the drive heads to the edge of the platter (while rotating the disks), and then insert my little shim. Then I pulled the drive heads off the drive (removing the top part of the magnet), and at this point I basically had the heads free and clear. Supposedly doing any of this is enough to kill the donor drive, right? After doing this, I reversed the process: put the heads back on, replace the magnet, remove the shim, return the heads to the “parked” position, close the drive back up, and connect it to my PC. A short time later and the drive is still working, at full speed even. Whew! Maybe there are some bad sectors at the edge of the disk, but at least with some impromptu testing that didn’t appear to be the case.
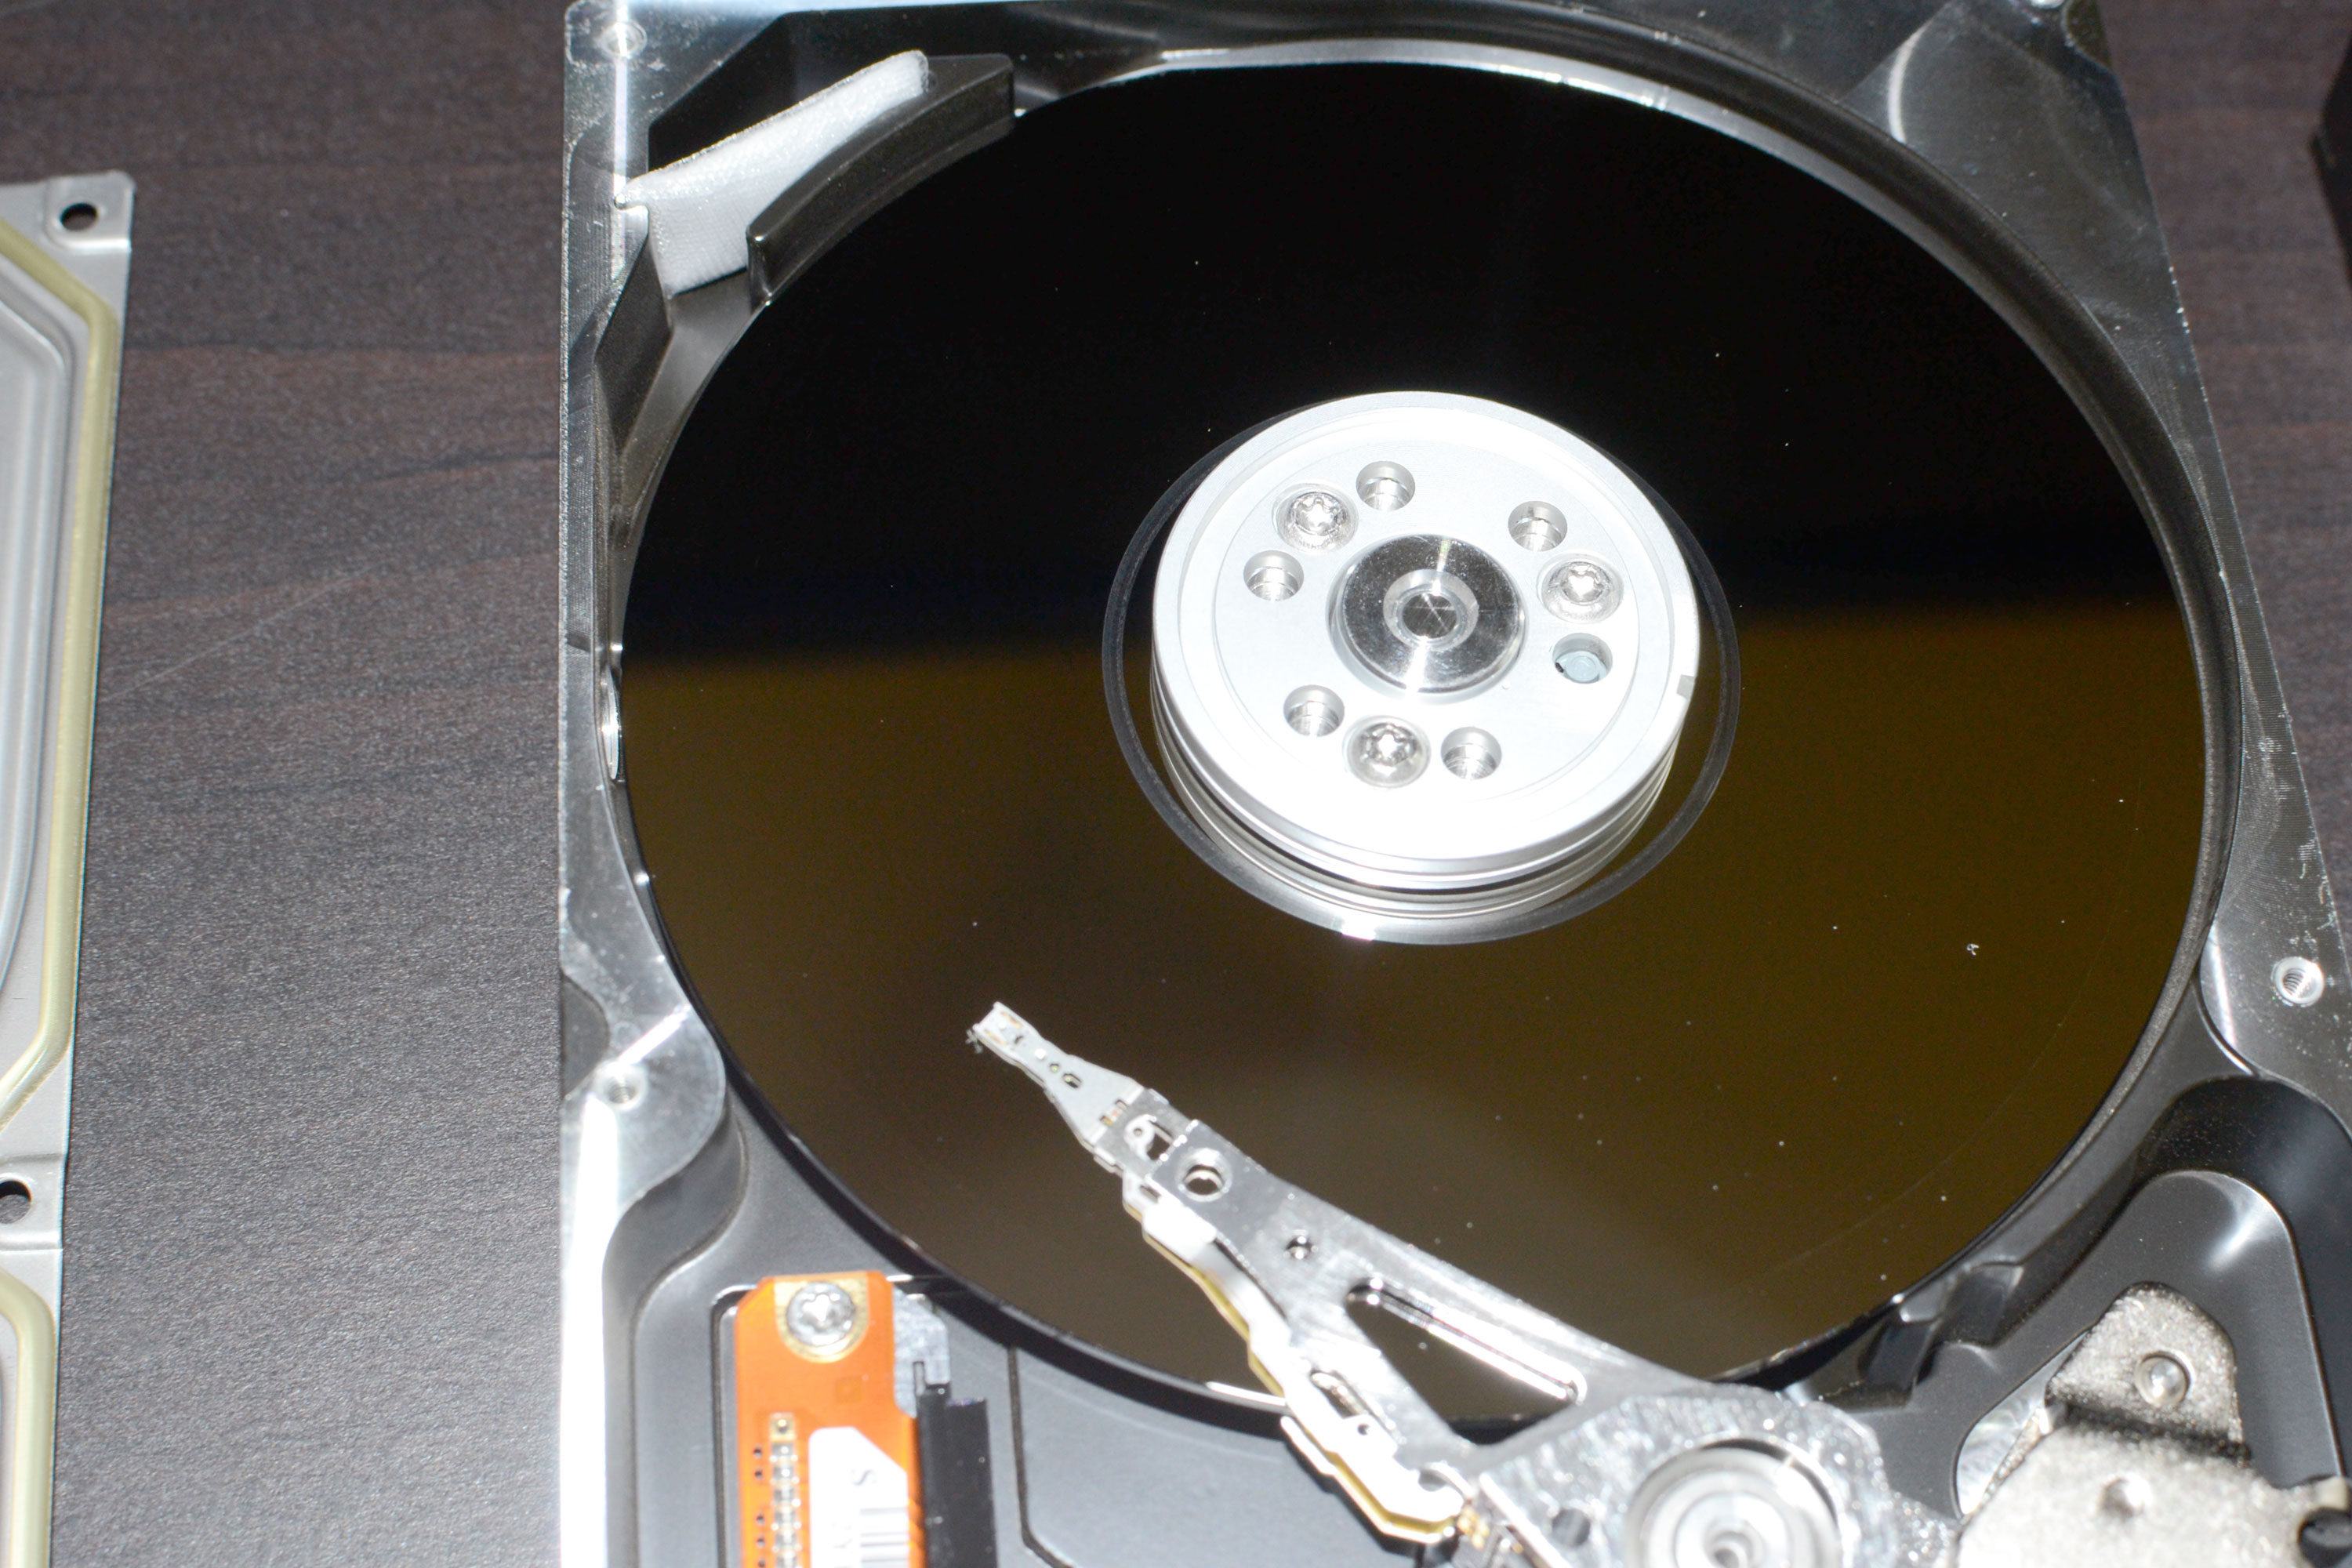
Having successfully moved the drive heads around and used my shim without killing the drive, it was now time to try a head transplant. I opened the donor again, opened the patient up, and guess what I found? The failed drive appears to have a ring scratched into the platter where the drive heads park. Ouch! So the heads have definitely crashed, and crashed hard – and what’s more, the scratched surface might be enough to make any transplant fail as well (as the working heads would be subject to the scratched surface as soon as you power it up). But, it’s still worth a try.

Removing the head assembly in the Maxtor is a slightly different process than on the Western Digital drives. The cover comes off the same way, but there are no screws holding the magnet in place; you just need to pry them apart. The head assembly on the other hand has two screws holding a smaller PCB in place, with a third larger screw on the pivot point of the actuator. Getting that last screw off while keeping the two drive heads “safe” is a bit trickier than on the Western Digital, as the powerful magnets can cause pieces to shift unexpectedly.
Sadly, in the process of trying to get the head assembly disconnected and out of the donor drive, I screwed up again and my little shim came out of its place, resulting in the two drive heads touching. My understanding is that the drive heads are very fragile, and I suspect there’s also an element of magnetism or something involved that can get thrown off if the heads touch. Whatever the case, after the heads touched I suspected that the resulting transplant would fail again, and I was right.
Three strikes and I’m out. I now have the original two dead drives and three others now added to my collection. Thankfully, my total cost other than time invested is at this point pretty small: $100 for the three replacement drives, and roughly ten hours of research and work on taking the drives apart and putting them back together. I’ve also tried a few combinations of hardware, but all signs indicate that I’ve damaged the drive heads on all three donors, and once damaged there’s no easy fix. Rather than investing more time and money, at this point I’m taking a break from the repairs and looking for other options.
Happily Never After?
Sadly, the Western Digital WD2500JB from my dad remains dead, as does the Maxtor MiamondMax Plus 9. At this point, I’m not sure if I want to try finding additional donors to try again, particularly with the Maxtor where the platters at the center look scratched. I’ve messed around enough that perhaps the data is at this point unrecoverable except with specialized tools. There are some tools that could help, though – like a drive head replacement tool that does the job of my ghetto shim, and does it better. Sadly, the only places I can find seem to sell them as a kit with anywhere from 20 to 100+ tools for various drive types. Obviously, most individuals only care about one tool, but finding someone that will sell a single – even for $5 – is difficult. If you really wanted to go whole hog, there are kits that have customized tools for removing the magnets, covers, etc. that run about $250, give or take. They would certainly help, particularly if you were to do this frequently, but for a single drive repair it would be a bit much.
The alternative of course is to try a data recovery company. My requirements for any recovery agency are that the cost is reasonable – $300 would be good, less is better, but up to $600 is at least worth considering. More importantly, there should be no charge unless data is successfully recovered. There are a ton of places that will attempt data recovery, but many charge exorbitant prices (sometimes more than $2000!) and most of them won’t even guarantee that they’ll be successful. I don’t need a guarantee of success, but there’s no way I’d pay $1000 or even $100 for a failure.
Just think about this: I tried three times, and while I don’t have any special tools there was at least a chance of success. I’ve dismantled and put together many a PC and laptop in my day, and I’ve only truly killed a few pieces of hardware by mistake (like the time I accidentally dropped a screw on the motherboard of a running PC and it managed to land in just the right place to short a few contacts and fry the board and CPU). Imagine if I started a data recovery company and charged even a partial $100 + hardware fee for failures! I could spend one hour trying a transplant, and if it doesn’t work I can send both the original drive and the failed donor drive back to the customer (as proof of effort) and pocket the $100 in fees, and maybe even charge a markup on the donor drive. Frankly, that would be absurd, but there are almost certainly companies that do exactly that. I’d go so far as to say paying for the failed donor drive(s) is even too much – if a company says they can recover my data, then they either succeed or they get nothing, sort of like working as a lawyer with a contingent fee: you only pay if they “win” your case. That at least gives them more incentive to do the work properly.
Then we have the FUD (Fear, Uncertainty, and Doubt) that the data recovery websites like to spread around to deter others from trying. Finding reputable sites that actually attempt a transplant and document the process is like finding the proverbial needle in the haystack, which is a big reason for why I’m writing this article. I personally know of at least two cases of people trying a drive transplant that worked enough for them to copy off their pictures and other important files; other than my above attempts, I don’t actually know of any outright failures – most people just give up and throw the dead drive in the garbage, as the $1000+ fees are more than they’re willing to pay.
One thing that I can corroborate is that doing a transplant on a hard drive is not something “simple”, and doing it without the proper tools might be a waste of time and money (and potentially render your data unrecoverable). Others might be better than I am and not make mistakes, but if I had another donor drive around I think I’ve learned enough at this point that I could be successful (assuming success is even possible). ISO certified Clean rooms are likely unnecessary for most people doing a single transplant, but at the same time your operating area should at least be clean. Even with my failures, I don’t believe for a minute some of the hyperbole thrown around about how this sort of thing should only be attempted by professionals. Just get the proper tools first, and be very careful, and I think there’s a decent chance you can do the transplant on your own. Or else fork over the hundreds of dollars to a specialist and hope for the best.
Of course, a far better solution is to set things up so that data recovery services aren’t even required. There are plenty of online backup services available, including iDrive, Mozy, SugarSync, and even DropBox. The problem is getting enough free storage to handle everything you need. I personally have over 200GB of documents, pictures, and videos that I would be sad to lose, which means if I wanted a single online backup utility I’d be looking at $80 per year or more. If I just want all my Word and Excel documents, though, it’s not that bad: less than 200MB total for all of those! But most people really don’t want to lose their digital photos, and as you can see that’s the lion’s share of the data I’d want to save (nearly 30,000 images totaling over 100GB). Local backup is of course a lot easier, and outside of the cost of a drive it’s “free”, but that doesn’t protect you from fires, theft, or other disasters, so you need to decide how important your data really is.
Wrapping this up, I don’t know for sure if it’s even possible to recover the data from these two drives at this point, but if anyone out there wants to give fixing either or both drives a go, send me an email. I might see about purchasing the tools to help do the transplant process at some point, but I’d want a good success rate before I’d consider that a worthwhile investment. (Then I could try doing the service for friends, family, etc. and recoup my costs.) But for now I’m done; like I said, if you think you can get the data off of either drive, feel free to contact me. At this point I have little to lose, and if you succeed (with reasonable pricing), I’d love to have some place I could direct our readers as well as friends/family/etc. who need such a service. On a similar note, if you have had personal success (or failure!) with a hard drive transplant, let us know in the comments; I’m sure I’m not the only one to have tried this, and it would be interesting to see how many have succeeded/failed, as well as get any other tips on how to proceed.


![GoldWave - [mel sampat part 2 - ORIGINAL.wav]](http://www.hanselman.com/blog/content/binary/WindowsLiveWriter/ThatSinkingFeelingandRepairingaCorruptWA_13765/GoldWave%20-%20%5Bmel%20sampat%20part%202%20-%20ORIGINAL.wav%5D_2.png)
_2.png)
_678x452.jpg)


 Posts
Posts

